
Friday, October 12, 2012

Sunday, September 9, 2012
Refinishing a mid century cabinet
Okay, I decided to blog about my experience refinishing this little $8 gem I found at a local thrift store. It is a mid century record cabinet. When I found it, I immediately was inspired by it and knew I needed to bring it back to life and put it in my new house!


- Primer (gesso)
- Acrylic paint
- Paint brushes
- Water
- Dremel tool (with rough brush head)
- Sand paper
- Plastic wood
- Hard work
First I sanded the entire top, made sure it was smooth, and Then filled in all the knicks with Plastic wood filler. After it was dry, I sanded it some more to make sure it was smooth.


Then here comes the worst part ever. REMOVING THE FELT. As you can see, whoever glued it had a field day with the glue. I removed and pulled as much off as I could by hand. This was a mistake. Because after doing some research, I read that the glue used was probably an animal glue that when wet would come off easily, well...I did wet the left over bits of felt and it did come off much easier, but the pieces that had larger chunks of felt came off easier...so in retrospect, I shouldve just not removed any of it until I soaked it, then removed it in one big piece.


See all that white? That's fluffy bit stuck to the glue.
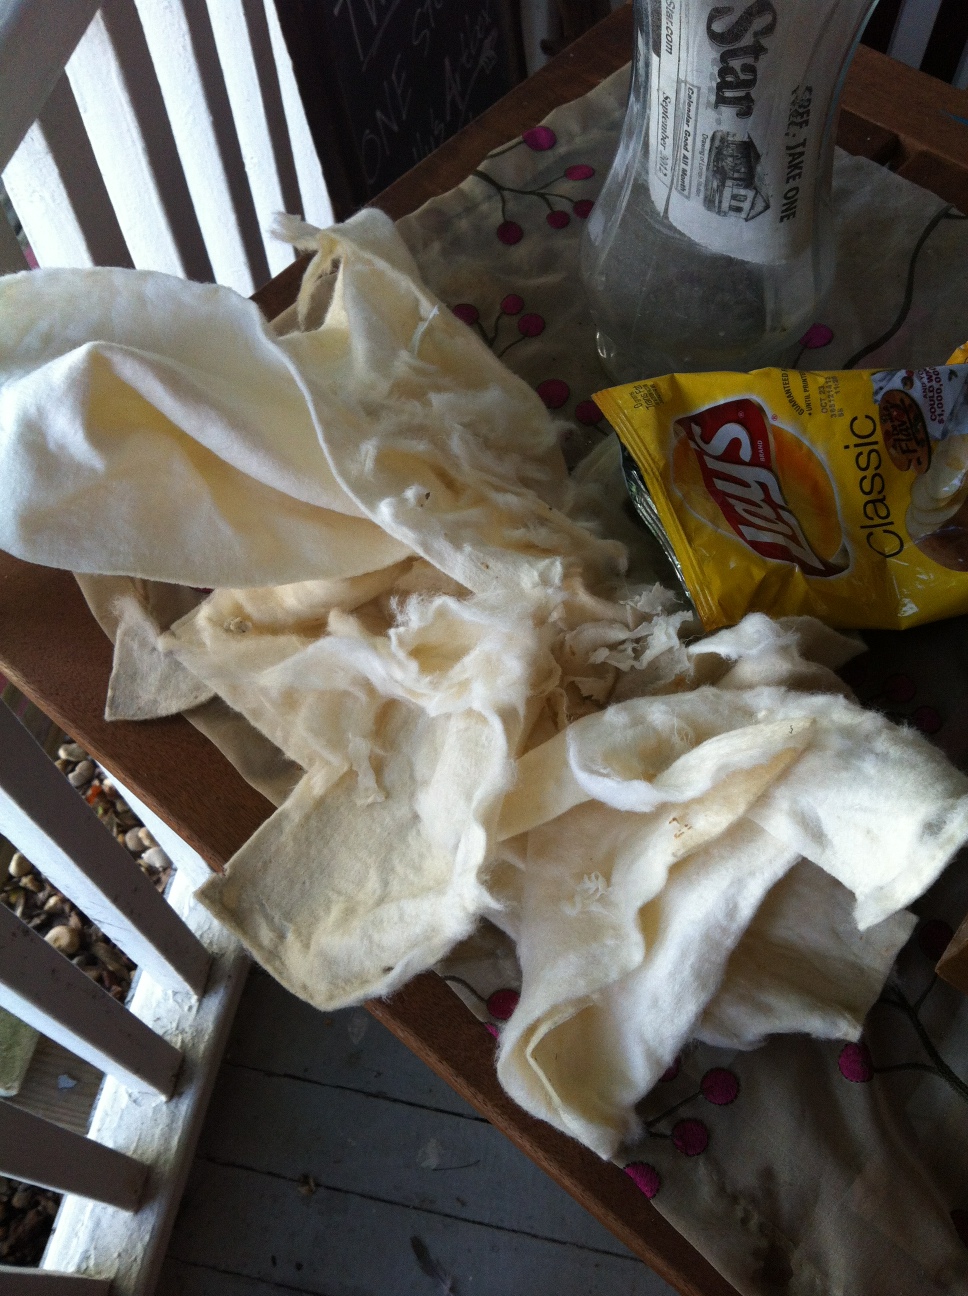


After removing all that gunk, you can see the brown paint just is terrible. I didn't want to sand all that off, so I decided to just paint the inside sides and cover the bottom with another piece of fabric.
I primed the entire outside with gesso.

I painted the insides blue. with acrylic paint I mixed up myself. I matched the color to the fabric I was using.

Ok, I decided to ombre' striped the doors. I don't know why, this was a difficult task. At first I painted all the stripes their different shades of gray, then tried to take a small brush and fill in the crevasses with black paint. Big mistake. I should've painted the black crevasses first, then the stripes...less touch up work. So that's what I did the rest of them, then went back over the stripes.


Then the fabric. I had this laying around (it was free!), and just so happened to be the exact length I needed! So I kept telling myself, measure twice, cut once....but idiot me cut it on the wrong side of the fabric and of course the slats were not evenly spaces, so it ended up being glued in wrong side up...but you can't really tell it's on the wrong side. :)
I painted about 4 coats of white acrylic on the rest of it. I probably shouldve just invested in house paint, but I already had acrylic around, so why pay more money if you don't have to?


Wednesday, July 11, 2012
I'm still here! It seems like the first thing to go by the wayside when I get busy is my blog.
The most recent thing I've accomplished is photographing a wedding here in Occoquan. The photos came out ok, not exactly happy having to shoot indoors with flash on a 108 degree day, but nonetheless there were some keepers.
Here is one of my favs
![]()
The most recent thing I've accomplished is photographing a wedding here in Occoquan. The photos came out ok, not exactly happy having to shoot indoors with flash on a 108 degree day, but nonetheless there were some keepers.
Here is one of my favs

Friday, April 29, 2011
Museum Quality Butterfly Dsiplays in Kelly's Artbox


New! Museum quality butterfly displays by a green certified San Fransico Artist and Biologist.
You'll love them! $30-40 each and they come with their own certificate describing the species.
Sunday, March 27, 2011
Love is in the air...


I don't consider myself a photographer, at least not of people. But every now and then I get the priviledge to take photos of friends and family, and in this case of my friend and his fiance'.
These are some of my favorites from the shoot.
If you're looking for a great photographer, my dear friend Lisa has her studio right above my store. www.lisajuliaphotography.com
Tuesday, February 22, 2011
A Peek into the Forest: Kelly's Artbox window display


I spent several hours on this display and am quite proud of it! Featured on the little toadstool shelves are some of my new products, including luxury botanicals by For Strange Women, a mossy green silk and velvet scarf by GreenPondCrafts, and new zipper pouches by The Dainty Squid.
Custom Breyer Horse- King


Meet King! Let me just tell you, I had my work cut out for me on this one. I know his coat pattern looks simple, but that wasn't the issue. It was his mane. King's one of those quirky horses that has mane on both sides. Well this breyer model had the majority of the mane on the wrong side. So I had to use my hand dandy dremel tool to take off most of the mane. I then used modeling expoxy to smooth it out, then sand, and prime and sand and prime and sand....and prime, until it was smooth and matched with his body. I then took epoxy and recreated his mane on the correct side.
What do you think?
These kinds of small details are why I have a job doing custom models. Not to mention, king has a "wild eye". His right eye has the whites showing, where his left eye doesn't. :-)
If you want your own custom, please contact me!
Subscribe to:
Posts (Atom)


